Wednesday, 19 February 2014

Edwardian catalogues.

 I was browsing through my bookshelves the other day, and rediscovered this book that had been given to me by my Grandmother a year or so ago. Edwardian Shopping; A Selection of Army & Navy Stores Catalogues. 1898-1913. 


I thought I'd show you some of my personal highlights.

It has an array of items, from corsets and collars, to typewriters and trunks. And bicycles. And revolvers. And wedding cakes. Y'know. The usual.


Styles changed a fair bit in the time period this book covers, and it gives a little insight to the everyday of the Edwardian being.


Of course, the gentlemen aren't forgotten.


An entire page, for collars!


Spotted Jane Austen in the Novels section. I must give Lady Susan a read...


POCKET WATCHES.


More corsets... This is getting into the early 1900s, and you can see the silhouette has changed a little.


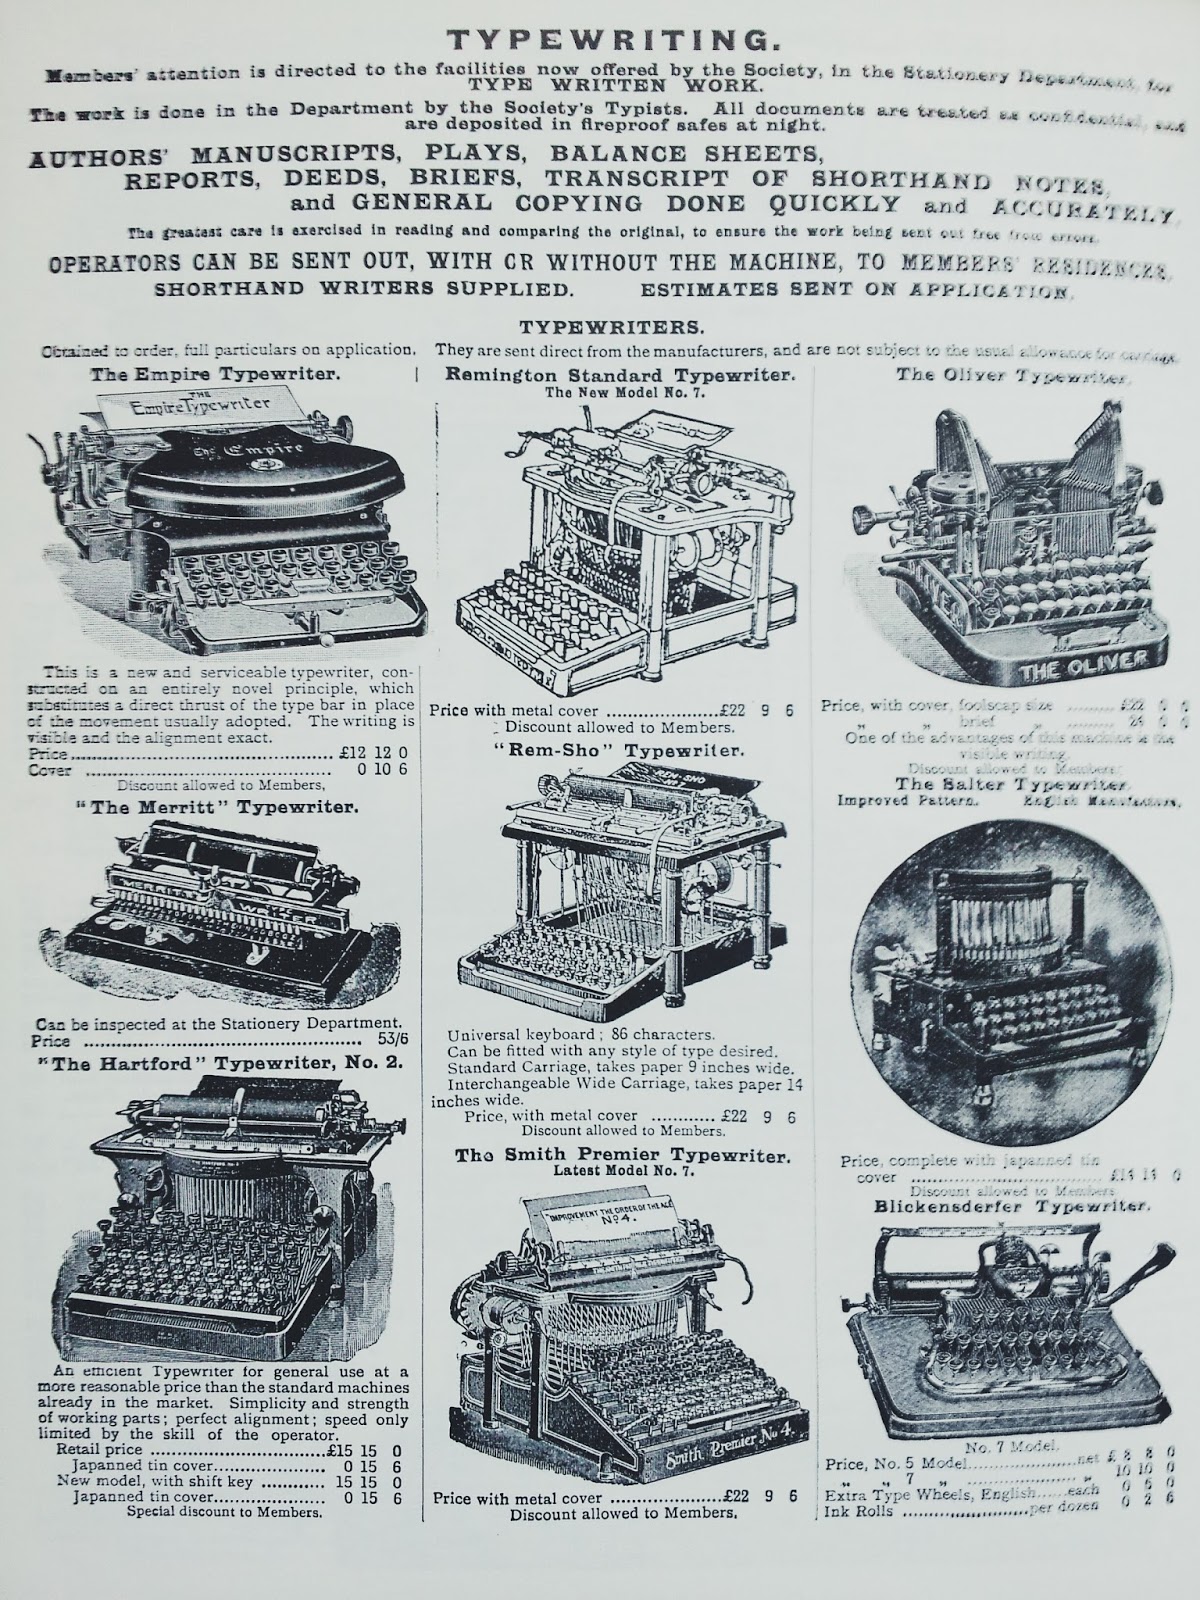
Typewriters. Lovely.


I believe I have a thing for trunks.


Corsets, this time from 1913. The silhouette has changed quite drastically now.


I shall be making good use of this book, now that I'm aware of its existence, and I'm sure it shall prove to be useful! Or just to look at. I don't mind.


Wednesday, 5 February 2014

Bags, bows, cards, and sock monsters.

Today, I had the opportunity to make a few little things to sell, and given that I had a matter of days to do so, a few little things it was.

Bags, bows, cards, and sock monsters, to be precise.


Look at them, the lil' gang. As for the design, I got the idea from Blue Peter many years ago, and over time it has evolved into what you see.


I quite liked this bag, actually. Out of everything, this is something I'd have wanted to keep, but alas, it sold.


I've always been a bit of a card maker, but only recently started trying out this 'style' of cards - pen and ink drawings.


And lastly, hair bows. These are very handy things to make for when you need emergency presents and the such. Here's the tutorial I based mine on.


Do let me know if you'd like some quick tutorials for anything! Everything here is fairly easy to make, and creating your own sock creature is actually rather fun.


Sunday, 29 December 2013

A Christmas catch up.


I hope you had a merry little Christmas!

I myself had a rather pretty little Christmas, with fairy lights strung about the place, the smell of mulled cider drifting through the air and 'White Christmas' playing its way through the house.

As for presents, a factor of Christmas that has always been the cause of a fair amount of excitement, I asked for some new dressmaking scissors (lovely and sharp, that actually cut through the fabric!). I also got a book on historical corset patterns, by Jill Salen.


My great great grandmother received a singer sewing machine for her 18th birthday in around 1900, it was then well used by every generation until it reached me. I remember my mum using it to make pillows for my barbies, and things like that. Once we got an electric sewing machine, it got put under the stairs and has been there ever since. Recently, I've been meaning to get it out and have a look, but just haven't got round to it.
It's that typical combination of remembering to do something when you have the time to do it!
Anyway, Boxing day (I think it was), I finally pulled it out of it's hiding place, lifted off the lovely cover...


And found the well loved sewing machine, along with its original instructions, and a box of various tools.


It all works, but it does need a bit of a clean up.

Being a sucker for old packaging, the box that holds the various tools and bits and bobs, I found almost as exciting as the original instructions, or the machine itself! Almost. 
It looks to be an old shoe polish box, and on the inside of the lid are instructions on how one would go about using 'Black Nugget Polish'.


It reads, "Kindly use SMALLEST quantity of the Polish with corner of a clean Brush - really, only a smear is required - brush it well into the Leather with the whole of the Brush, and after getting a polish, finish off the a Pad." 

How polite.


Well, it's nice to be back on the blogging scene after having accidentally taken the summer and the autumn off, ahem. 

I wish you a Happy New Year!


Saturday, 28 December 2013

I am still here, promise.

I was originally going to say that I took the summer off blogging, but then it turned out to be the autumn, too. My excuse?

I've been busy.

That's it, I'm afraid.

But, I've been busy with interesting things! More posts to come, but here's a few sneak previews.


Tuesday, 18 June 2013

Fox cushion cover.

So the other day, I was in a very creative mood, and almost couldn't stop. (or rather, I didn't want to)

One thing I came out with, was this fox cushion cover -


Sweet, is it not? I came across this tutorial from A Beautiful Mess, and had to give it a go. I didn't have enough stuffing to make a 'plush doll', so I decided to adapt it to make a cushion cover - which did mean it ended up square, and not as fox looking as the ones pictured in the tutorial, but hey ho!


I measured around the cushion, added a couple of inches to be safe, with one inch seam allowance, and drew a square on the main fabric. Added the ears, and cut it out. I then cut about a third from the bottom of one of the pieces, that then became the back, and filled the gap with the contrasting fabric.


Stitched on a triangle of contrasting fabric, a circle of patterned, three buttons - one for the nose, two for the eyes - and I was ready to start constructing the cushion cover!


I hemmed the two back pieces, I thought having the hem on the outside added a bit of detail.I then laid one just over the other, pinned them to the front piece, making sure to keep the right sides together so I could turn it the right way around. Stitched it all up, clipped the corners, turned it inside out and voila! All I then had to do was sew a button and a bit of cord on the back to keep it closed, and I was done. 


Making cushion covers can be really simple, but you can make them so interesting just by adding a few scraps of fabric, or changing the shape, or even covering them with sequins. This only took me a few hours and a bit of improvisation, but the world is your oyster when it comes to cushion covers.

Saturday, 27 April 2013

Patch pocket skirt.


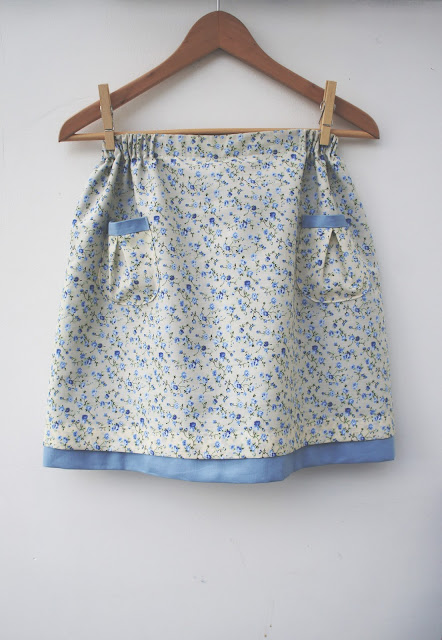
My sister has been asking me to make her a skirt for ages; she even went so far as to send me an email entitled 'Pleeeaase' and attached was a link with a quick tutorial for one. So with that link and some basic alterations in mind, I set to work, and was done in a day. This is what I came up with! Along with a little info on how I went about it...

This is my first lined skirt, as well as my first attempt at patch pockets. Not bad, if I do say so myself! And I do love the fabric... Anyway.

So, I started with two rectangles of fabric - the patterned and the lining - long enough to allow for the hem and the bit for the elastic to go through, I wasn't so fussed about the width as the elastic would see to that.

I folded the top of the patterned fabric down twice, making sure to leave enough room for the elastic to pass through, and sort of stuck the lining fabric underneath the fold, and then stitched along. You can kind of see it in this photo -


Now, I was kind of making this up as I went along, so it was at this point I thread the elastic through, just to see how it looked, and to decide where the pockets should go, as my sister decided she wanted some! The pockets are just two rough semi circles pleated in the middle and sewn, at the top, to a strip of the lining fabric.


I sewed the pockets on, then folded the skirt right sides together and stitched only the elastic, as I wanted to finish off the lining as best as I could. Then I sewed up the lining and the outer skirt separately. However, I didn't like just having the top of the seam on show (raw edges, no thank you) so I covered it up like so -


By simply hand stitching a little piece of the lining fabric over the top.

I sewed the hem by machine -


And got my sister to try it on. It didn't quite look the right shape, it was too poofy at the front. Easily fixed by pulling gently on the fabric at the waistband at the front until it was pulled straight, and then add a row or two of stitches either side. You can more or less see what I mean in this photo -


And that's basically it! Obviously the end result would differ should I make another one with a heavier fabric, or thinner elastic, all that jazz. But I shall get experimenting, and shall have a go at making one for myself! I really should get to make more everyday clothes, because as much as a medieval dress may come in handy, ahem, it's not incredibly practical. I mean, have you seen those sleeves? But yes, summer 2013 wardrobe, here I come!


Thursday, 4 April 2013

"To Joan, from Marie. Oct 27th 1915"


I found this pretty little edition of Jane Eyre by Charlotte Bronte, from 1914 I think, in a charity shop a few weeks back and have only now remembered I took a few photos, so I thought you might like to see.


I certainly have a thing for old books, especially the classics that are still published today, as fascinating as out of print books may be. I mean, it just shows that a good story really can withstand time.

So, I spotted this one thanks to it's gorgeous spine, picked it from the shelf, opened it up, and look -


A personal message reading "To Joan, from Marie. Oct 27th 1915"

Safe to say, I needed no further encouragement to make a purchase.

It was when I was having a quick look through later that day that I discovered the back pages to be a 'List of the series' including prices! Yeah, I'm a bit of a sucker for that too.


I have bought so many books lately, but haven't been reading much due to a sudden increase in my musical soundtracks library, ahem, so my 'to read' list is more of a who's who of literature at present, which is something I intend to take care of!